Install Walkthrough for TazUO: Difference between revisions
From IUO Tome of Knowledge
No edit summary |
No edit summary |
||
| (4 intermediate revisions by the same user not shown) | |||
| Line 11: | Line 11: | ||
#; Choose the location you created above, <code>C:\InsaneUO</code>, for the Install Location and click Install | #; Choose the location you created above, <code>C:\InsaneUO</code>, for the Install Location and click Install | ||
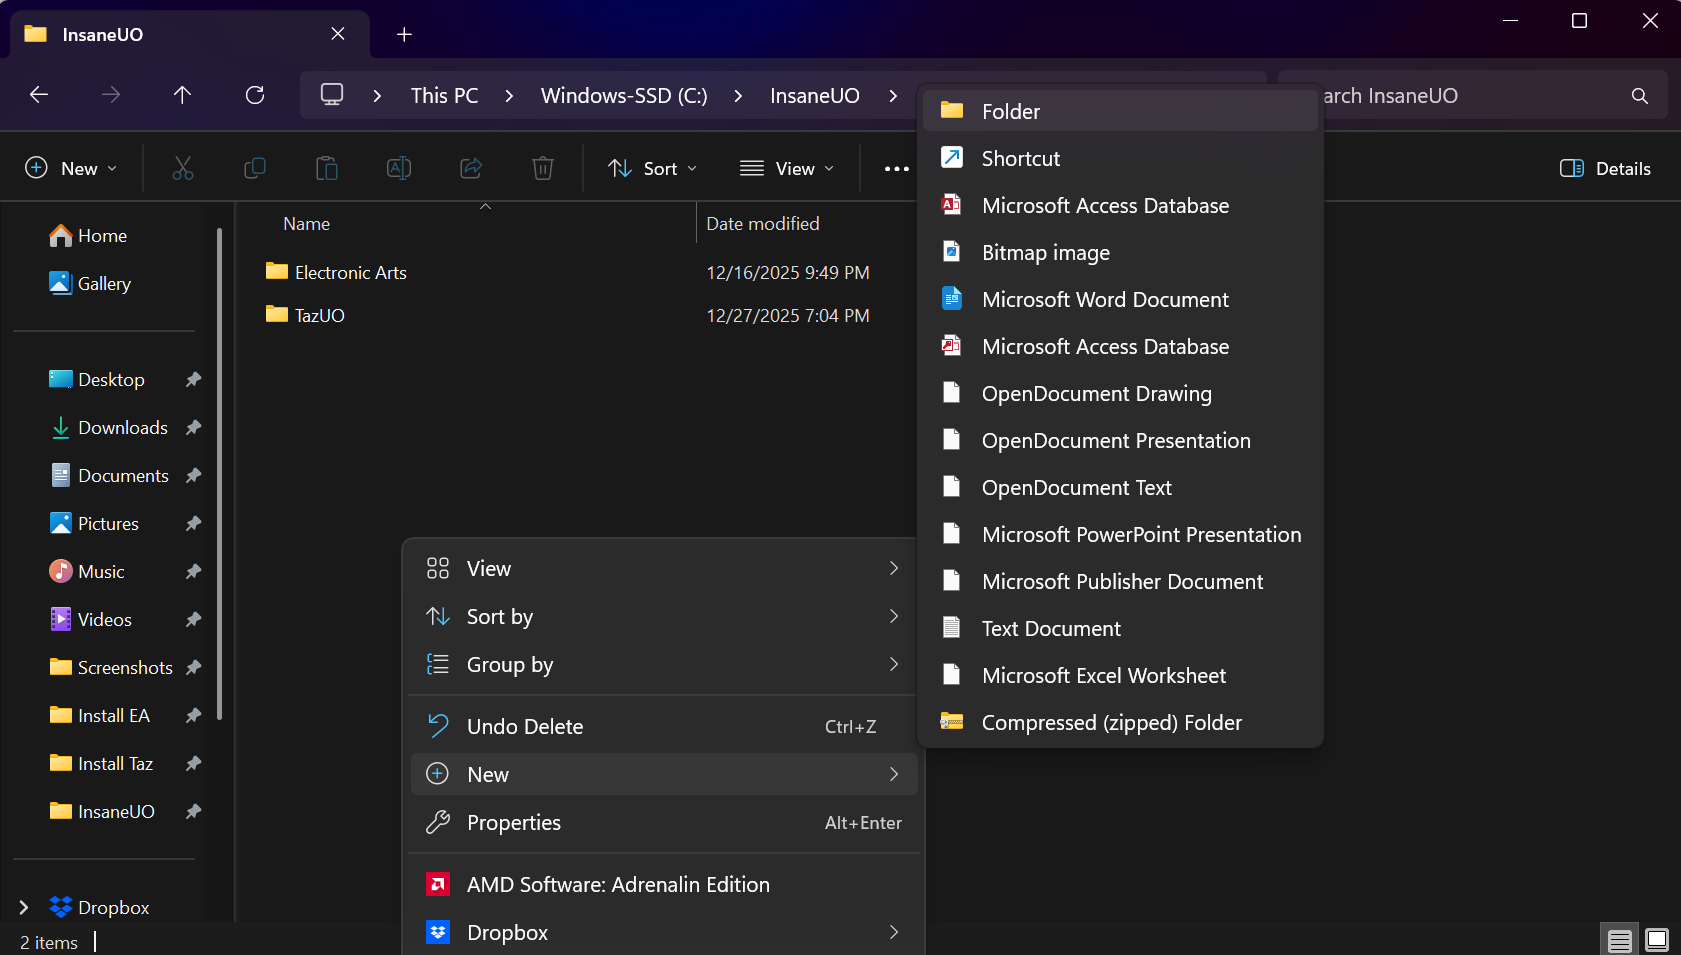
#; [[File:3a-installea.png]] | #; [[File:3a-installea.png]] | ||
# | # Wait for the install to complete | ||
== Patching the Official EA Client == | |||
# Launch the "Ultima Online Classic Client" from the icon on your desktop, your start menu, or from <code>C:\InsaneUO\Electronic Arts\Ultima Online Classic\UO.exe</code> | |||
#; Wait for the client to patch | #; Wait for the client to patch | ||
#; [[File:4-patchea.png]] | #; [[File:4-patchea.png]] | ||
| Line 19: | Line 22: | ||
#; At the bottom center is a version number. Write this down or paste it in a text file. You will need it when configuring the launcher. At the time of this writing, the version is <code>7.0.113.0</code>. | #; At the bottom center is a version number. Write this down or paste it in a text file. You will need it when configuring the launcher. At the time of this writing, the version is <code>7.0.113.0</code>. | ||
#; [[File:6-versionea.png]] | #; [[File:6-versionea.png]] | ||
# Close the Official Client | |||
== Installing the TazUO Launcher and TazUOClient == | == Installing the TazUO Launcher and TazUOClient == | ||
| Line 41: | Line 45: | ||
#; In the security section, check the "Unblock" checkbox. | #; In the security section, check the "Unblock" checkbox. | ||
#; [[File:6-tazuounblock.png]] | #; [[File:6-tazuounblock.png]] | ||
# Open the Launcher | # Open the TazUO Launcher | ||
# Pick what channel of client you want. | # Pick what channel of client you want. | ||
#; Legacy will work with assistants like Razor Enhanced and is recommended | #; Legacy will work with assistants like Razor Enhanced and is recommended | ||
| Line 48: | Line 52: | ||
#; [[File:7-tazchannel.png]] | #; [[File:7-tazchannel.png]] | ||
# Click "Download now" and the Taz client will be downloaded | # Click "Download now" and the Taz client will be downloaded | ||
== Create a profile in TazUO == | |||
# Open the TazUO Launcher | |||
# Click "Select a profile" and then "[ Edit Profiles ]" | # Click "Select a profile" and then "[ Edit Profiles ]" | ||
# Create a new profile | # Create a new profile | ||
#; Name the profile in a way that makes sense to you. "Account 1" for example | #; Name the profile in a way that makes sense to you. "Account 1" for example | ||
#; If you are new to the shard, put in an username and password and the account will be automatically created. You can have up to 3 accounts on Insane UO! | #; If you are new to the shard, put in an username and password and the account will be automatically created. You can have up to 3 accounts on Insane UO! | ||
#; Using a password longer than 16 characters can cause issues. The EA Client does not support longer than 16 character passwords. | |||
#; Use the following for "Connection" section | #; Use the following for "Connection" section | ||
{{Server_connection_info}} | {{Server_connection_info}} | ||
| Line 73: | Line 81: | ||
#; [[File:3-razorextract.png]] | #; [[File:3-razorextract.png]] | ||
== Configuring TazUO to | == Configuring TazUO to launch Razor == | ||
# Open the Launcher | # Open the TazUO Launcher | ||
# Click the profile dropdwon and then "[ Edit Profiles ]" | # Click the profile dropdwon and then "[ Edit Profiles ]" | ||
# Choose the profile you created above and then click on the "Plugins" tab | # Choose the profile you created above and then click on the "Plugins" tab | ||
| Line 82: | Line 90: | ||
# Click "Save" | # Click "Save" | ||
# Click the 'X' to close the window | # Click the 'X' to close the window | ||
== Play! == | |||
# Open the TazUO Launcher | |||
# Pick the profile you want to play and click "Play" | |||
# Be sure to check out other articles to find out more about Insane UO. | |||
#; [[Quickstart_Guide|The Quickstart Guide has a lot of info!]] | |||
[[Category:Getting Started]] | |||
Latest revision as of 01:22, 28 December 2025
Installing the Official EA Client
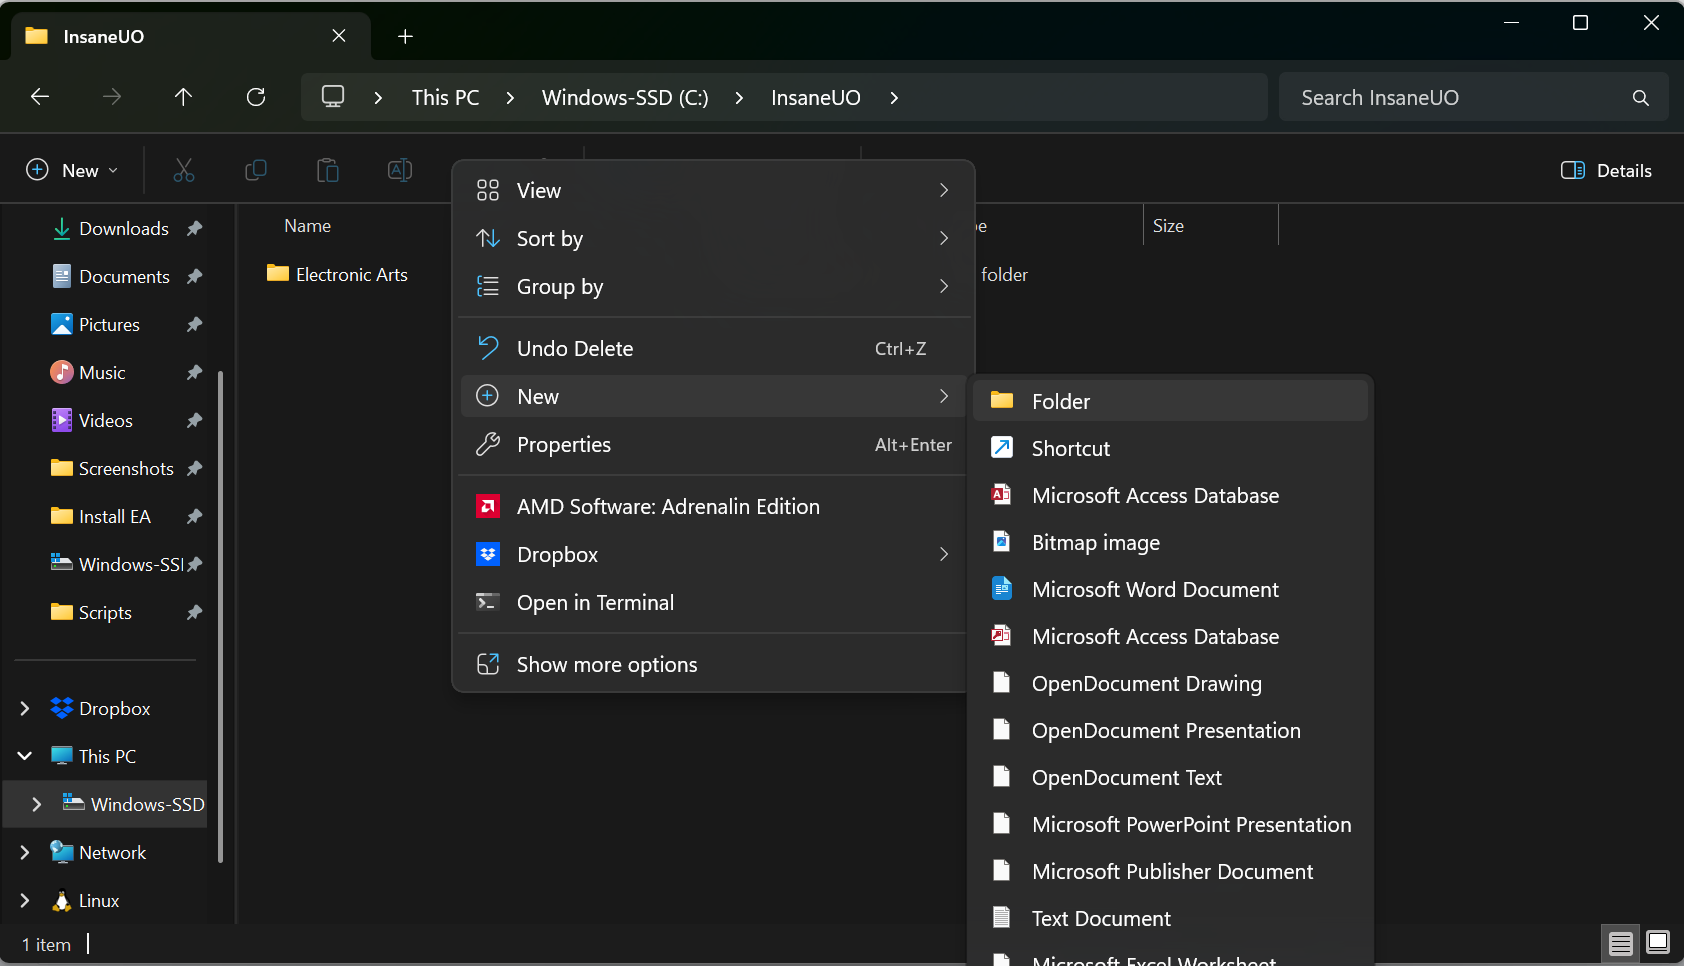
- Create a folder to contain everything related to Insane UO.
- Navigate to the location you want to create a new folder. For this guide, we will use the location
C:\. You're welcome to choose another location. Installing on OneDrive is NOT recommended though might work if you set the files to stay locally. - Right click in an empty spot and choose New Folder
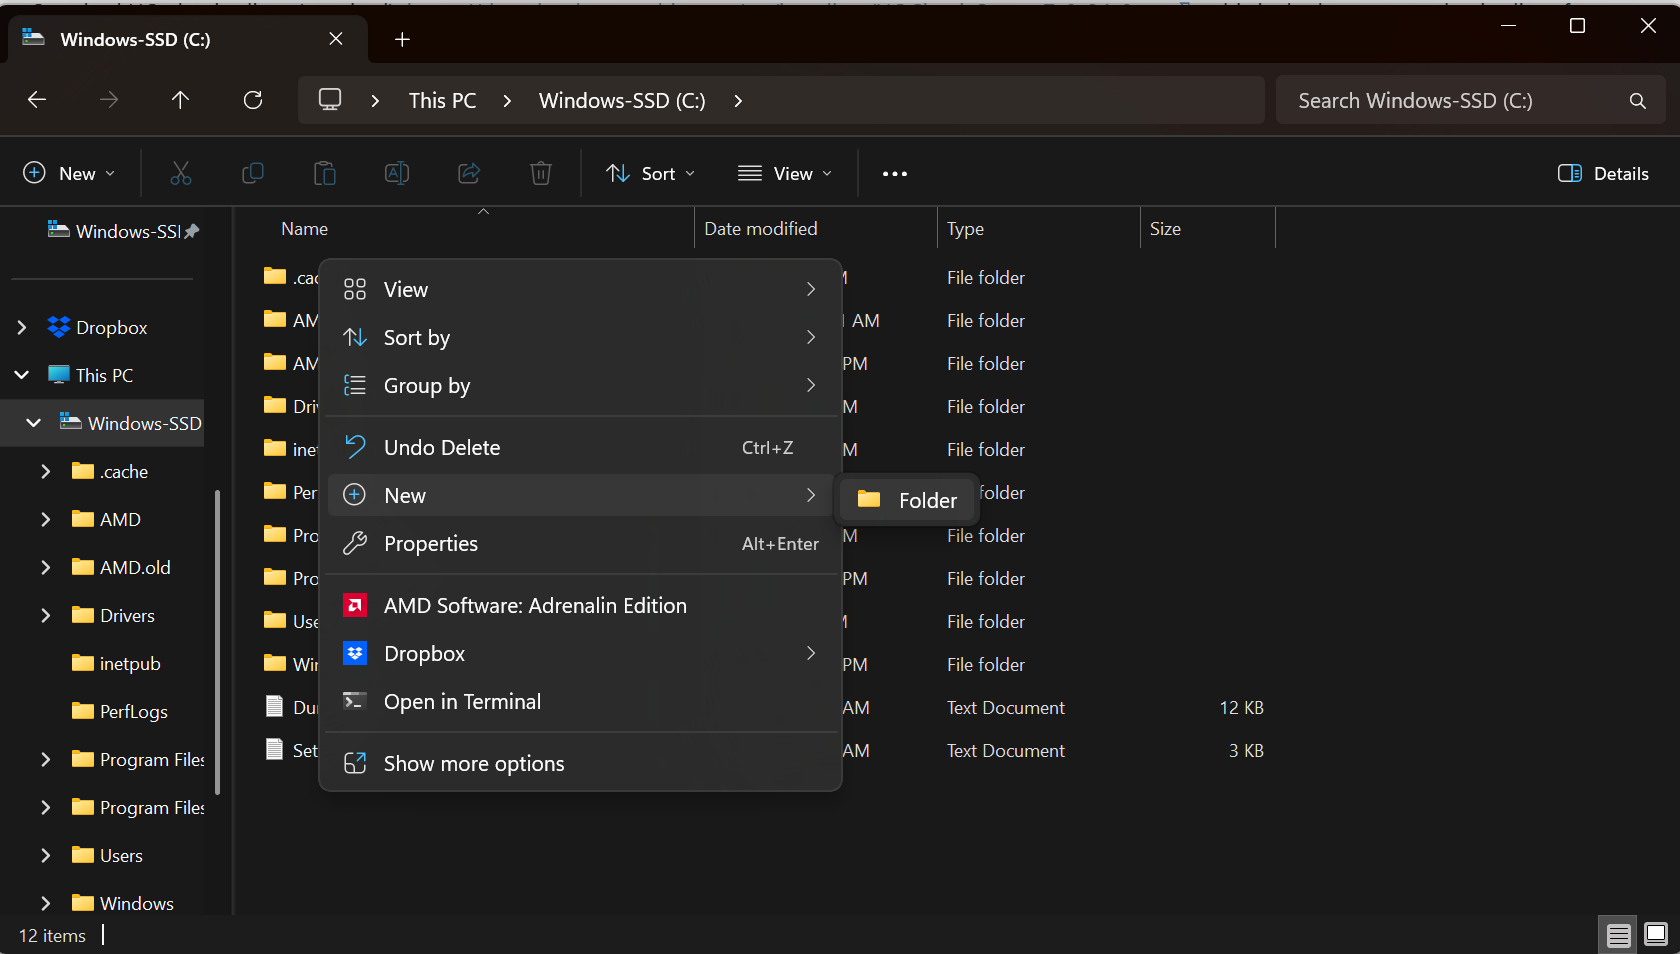
- Name the folder "InsaneUO"

- Navigate to the location you want to create a new folder. For this guide, we will use the location
- Download the official client https://downloads.eamythic.com/uo/installers/UOClassicSetup_7_0_24_0.exe
- Open the download to begin installation
- Choose the location you created above,
C:\InsaneUO, for the Install Location and click Install 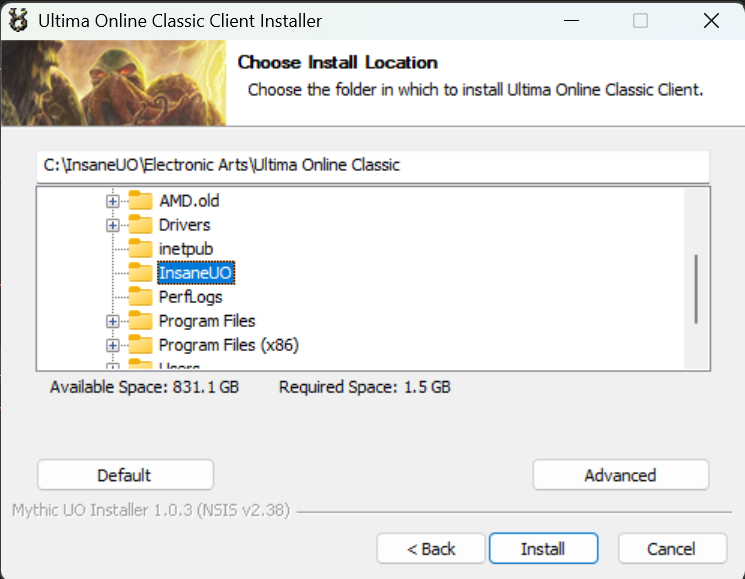
- Choose the location you created above,
- Wait for the install to complete


Patching the Official EA Client
- Launch the "Ultima Online Classic Client" from the icon on your desktop, your start menu, or from
C:\InsaneUO\Electronic Arts\Ultima Online Classic\UO.exe- Wait for the client to patch
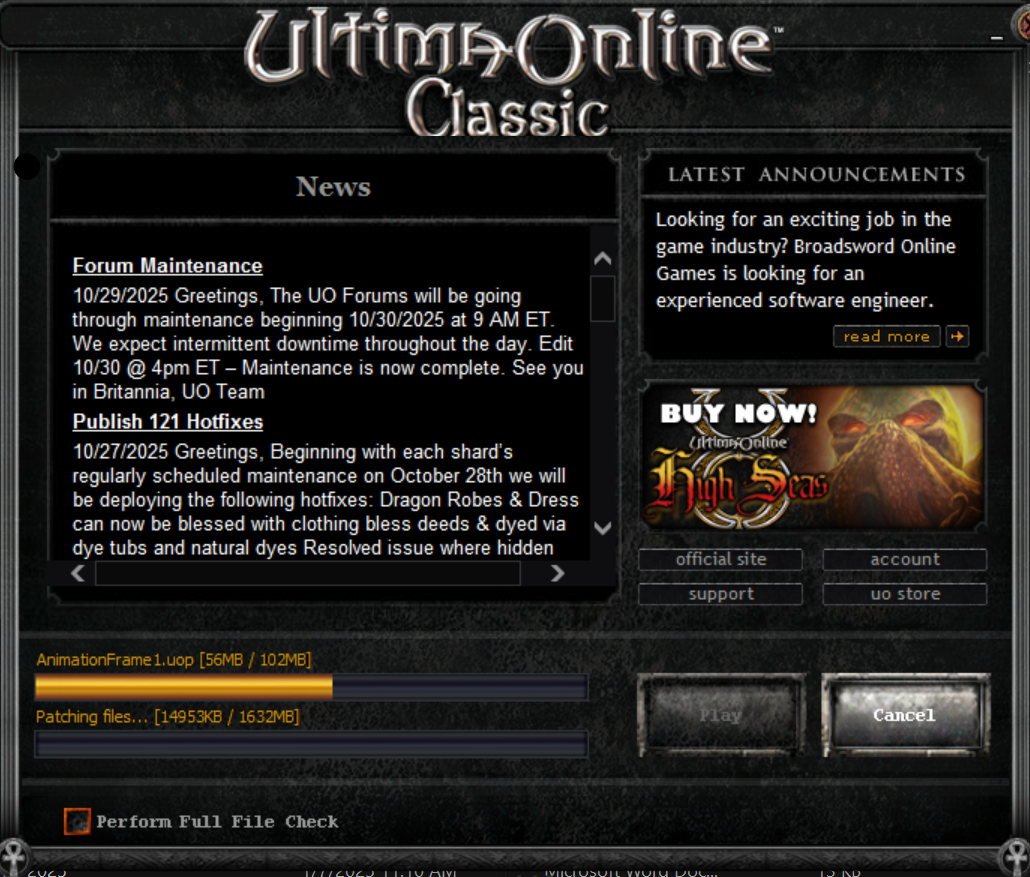
- Once patching is complete, press the "Play" button
- The "Ultima Online Classic Client" should now open.
- At the bottom center is a version number. Write this down or paste it in a text file. You will need it when configuring the launcher. At the time of this writing, the version is
7.0.113.0. 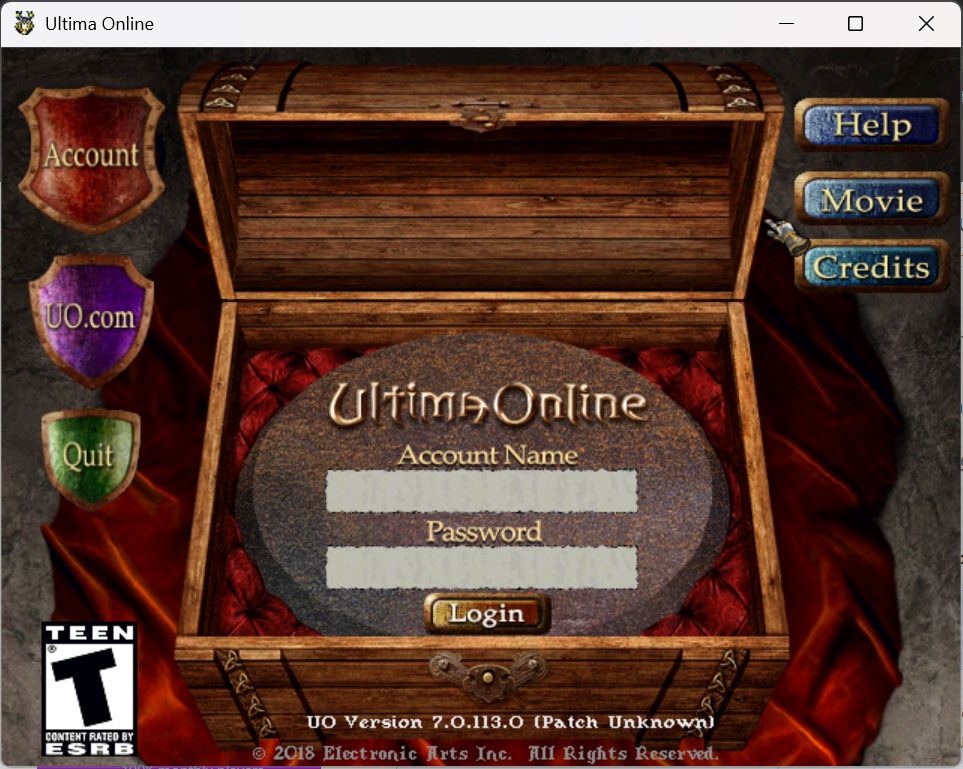
- At the bottom center is a version number. Write this down or paste it in a text file. You will need it when configuring the launcher. At the time of this writing, the version is
- Close the Official Client


Installing the TazUO Launcher and TazUOClient
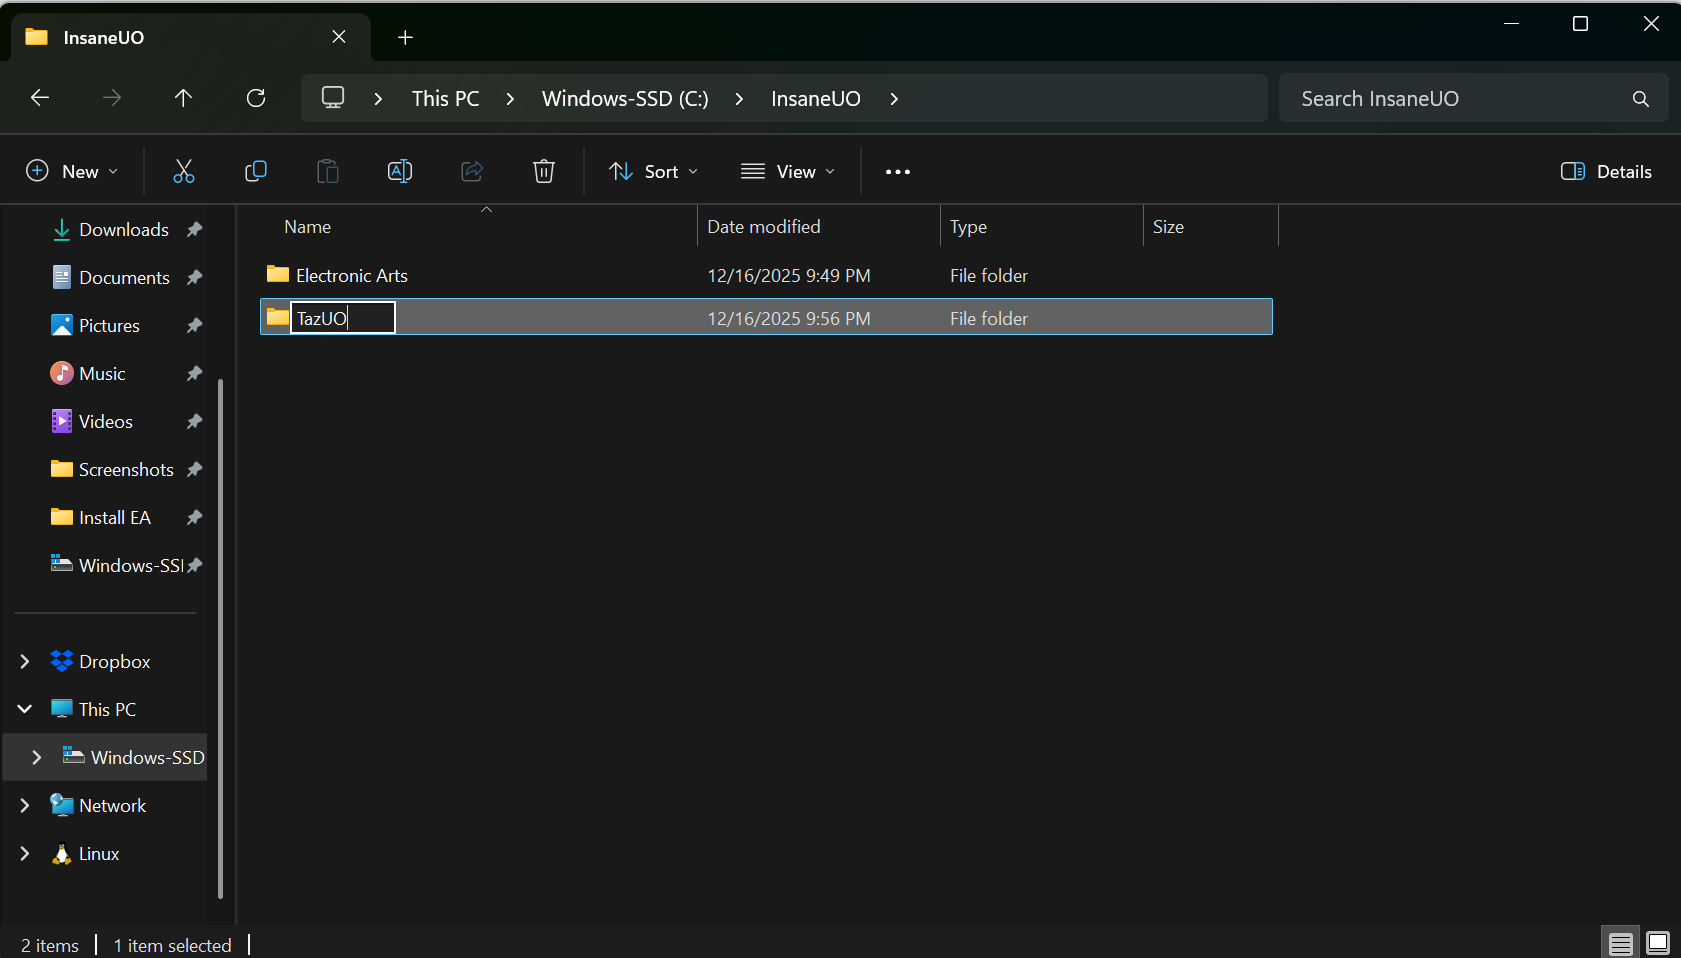
- Create a folder to contain TazUO
- Navigate to the location that you want to store the TazUO files. For this guide, we will use the location
C:\InsaneUO. - Right click in an empty spot and choose New Folder
- Name the folder "TazUO"
- Navigate to the location that you want to store the TazUO files. For this guide, we will use the location
- Download the TazUO launcher from https://github.com/PlayTazUO/TUO-Launcher/releases/tag/TazUO-Launcher
- This guide is focused on the Windows platform. At the time of this writing, the latest version of the TazUO Launcher is
2.6.7. - Download
TazUO-Launcher.win-x64.zip 
- This guide is focused on the Windows platform. At the time of this writing, the latest version of the TazUO Launcher is
- Extract the files from the zip
- Right click the download and choose extract all
- Set the destination to
C:\InsaneUO\TazUO 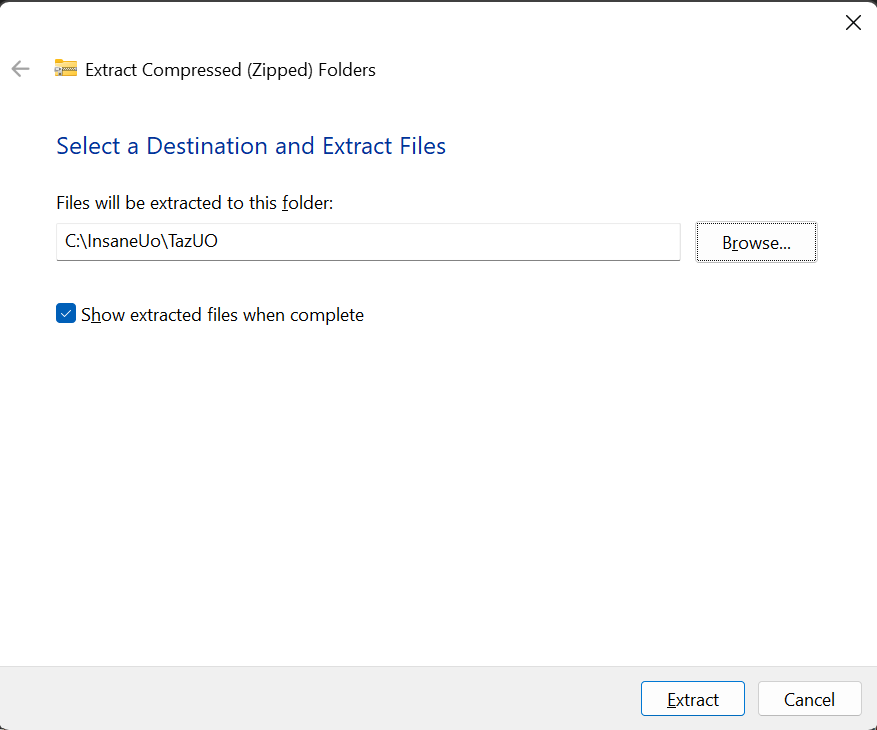
- Unblock the Launcher
- Navigate to
C:\InsaneUO\TazUO - Right click
TazUO Launcherapplication and choose properties 
- In the security section, check the "Unblock" checkbox.

- Navigate to
- Open the TazUO Launcher
- Pick what channel of client you want.
- Legacy will work with assistants like Razor Enhanced and is recommended
- Main receives more updates but is not compatible with assists
- For more info, visit https://tazuo.org/introduction/modern-vs-legacy/
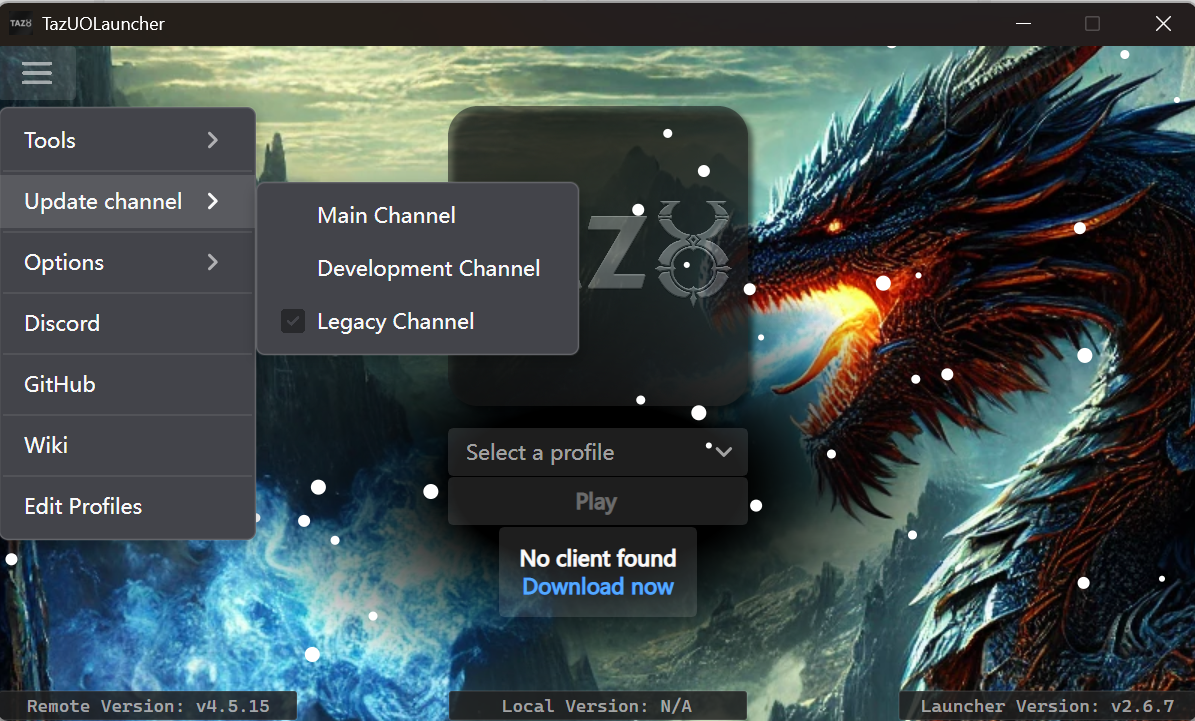
- Click "Download now" and the Taz client will be downloaded


Create a profile in TazUO
- Open the TazUO Launcher
- Click "Select a profile" and then "[ Edit Profiles ]"
- Create a new profile
- Name the profile in a way that makes sense to you. "Account 1" for example
- If you are new to the shard, put in an username and password and the account will be automatically created. You can have up to 3 accounts on Insane UO!
- Using a password longer than 16 characters can cause issues. The EA Client does not support longer than 16 character passwords.
- Use the following for "Connection" section
Server Address: login.insaneuo.com
Port: 2593
- Click "Locate" beside "UO Directory" and choose where you installed the Official EA client. For this guide, the location is
C:\InsaneUO\Electronic Arts\Ultima Online Classic - If the client version does not auto populate, input the client version for the Official EA client. For this guide, the version is
7.0.113.0 
- Click "Locate" beside "UO Directory" and choose where you installed the Official EA client. For this guide, the location is
- Click "Save"
- Click the 'X' to close the window

Installing Razor Enhanced
- Create a folder to contain Razor
- Navigate to the location that you want to store the Razor files. For this guide, we will use the location
C:\InsaneUO. - Right click in an empty spot and choose New Folder
- Name the folder "Razor"
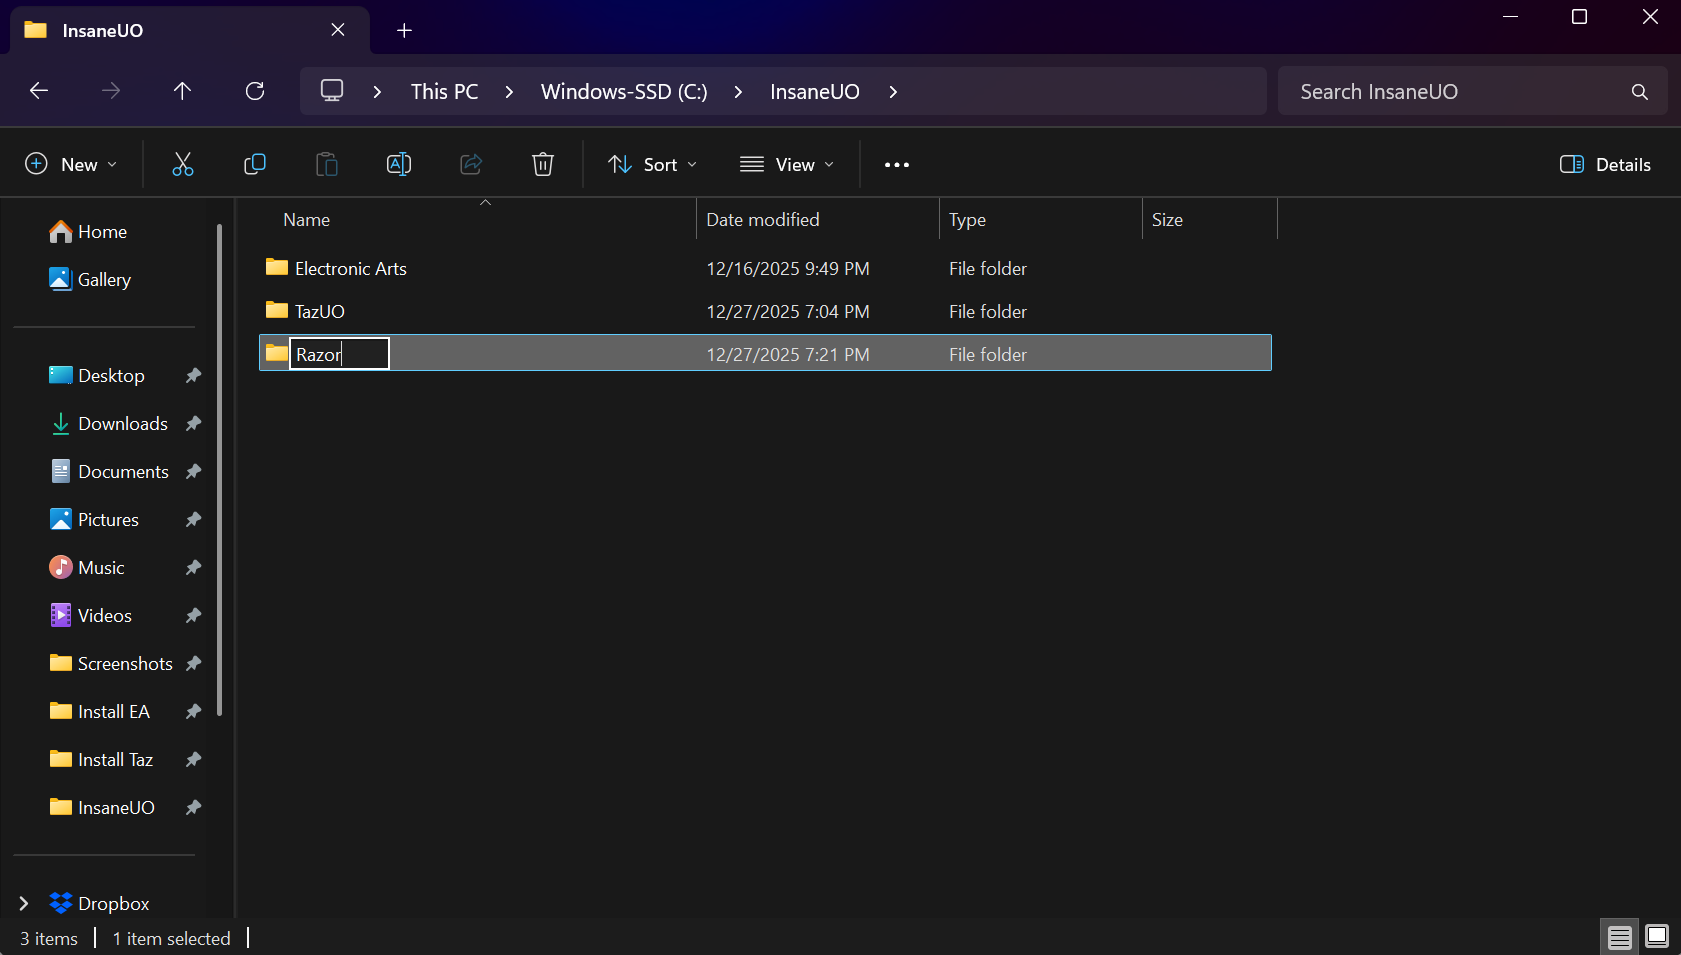
- Navigate to the location that you want to store the Razor files. For this guide, we will use the location
- Download the latest Razor Enhanced from https://razorenhanced.net/
- Extract the files from the zip
- Right click the download and choose extract all
- Set the destination to
C:\InsaneUO\Razor 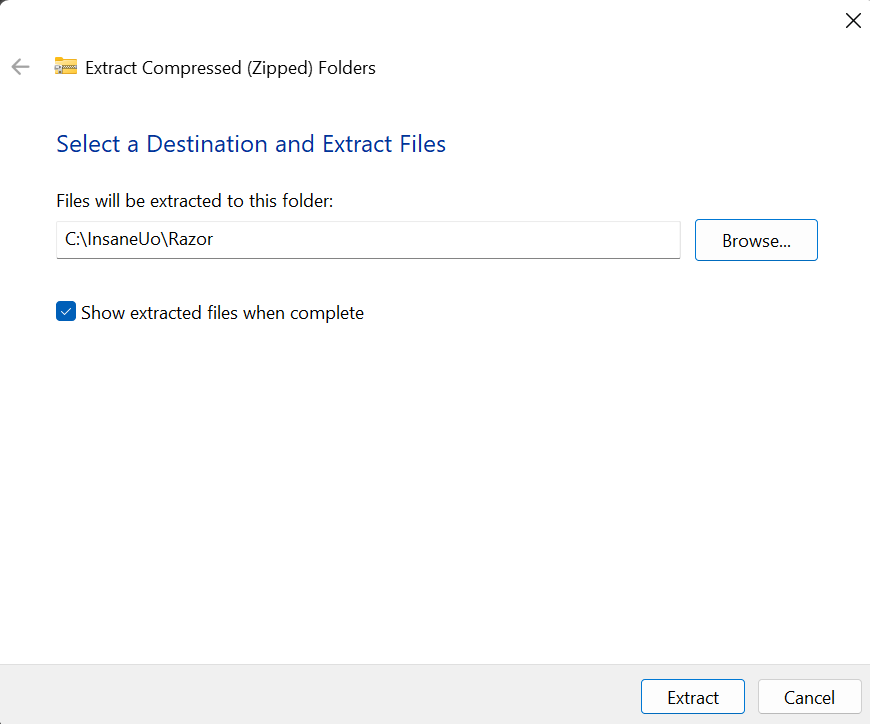


Configuring TazUO to launch Razor
- Open the TazUO Launcher
- Click the profile dropdwon and then "[ Edit Profiles ]"
- Choose the profile you created above and then click on the "Plugins" tab
- Press "Add" and choose where you installed Razor Enhanced. For this guide, the location is
C:\InsaneUO\Razor\RazorEnhanced.exe - Click "Save"
- Click the 'X' to close the window


Play!
- Open the TazUO Launcher
- Pick the profile you want to play and click "Play"
- Be sure to check out other articles to find out more about Insane UO.
